
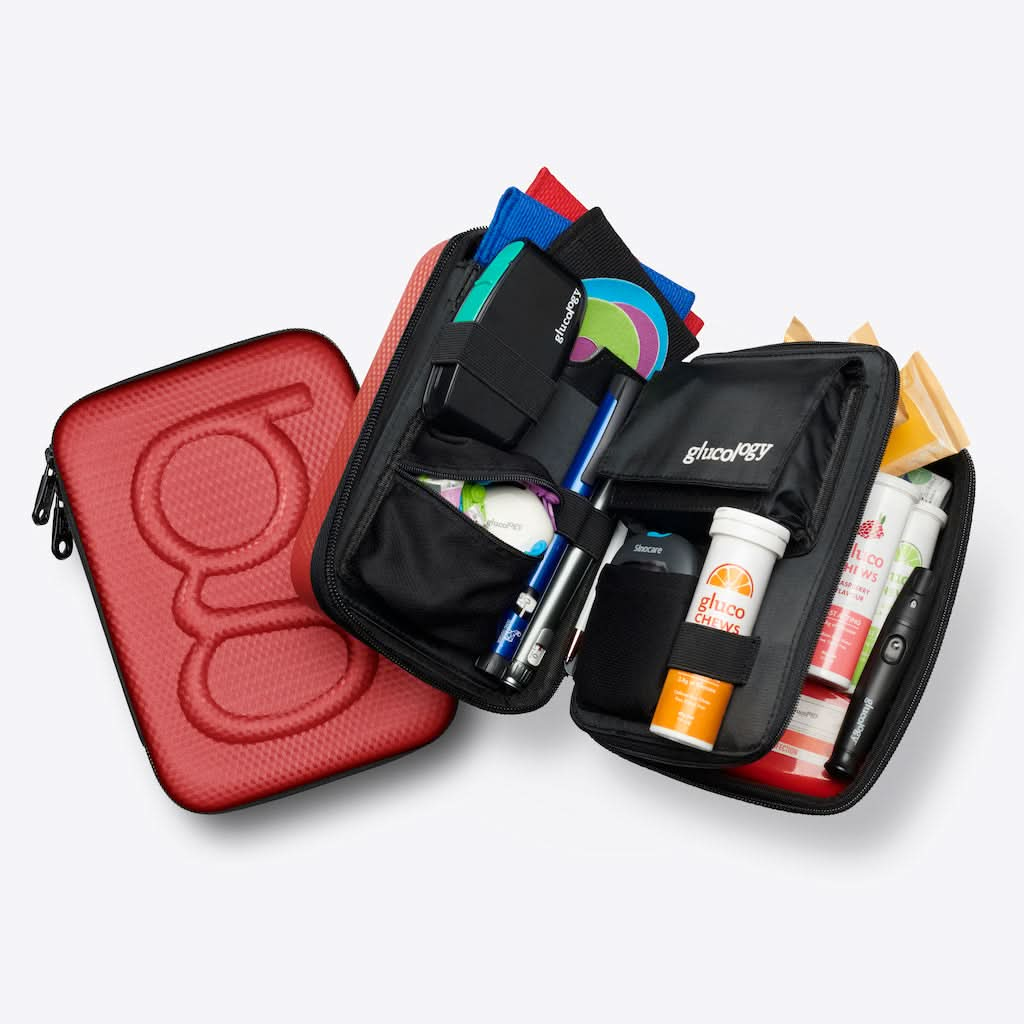
The Best Bags and Accessories for Carrying Diabetes Equipment in Children
For children living with diabetes, carrying supplies should be safe, organized, comfortable, and easy to manage. A good diabetes bag is more than just a place to store medical equipment—it can help a child feel more independent while making it easier for parents, teachers, coaches, and caregivers to find what they need quickly.
The ideal setup depends on the child’s age, whether they use insulin injections or an insulin pump, whether they use a CGM, and how much equipment they need to carry.
What Should a Child’s Diabetes Bag Contain?
A basic diabetes supply kit may include:
Blood glucose meter
Test strips
Lancets and lancing device
Insulin and insulin-delivery supplies
Syringes or pen needles, if used
Continuous glucose monitor supplies
Extra pump supplies, if applicable
Fast-acting glucose, such as glucose tablets or another appropriate source
Snacks
Glucagon or another prescribed emergency treatment
Alcohol wipes or other supplies recommended by the child’s care team
Medical identification
Backup batteries or charging equipment when applicable
A small supply of tissues or wipes
Emergency contact information
The CDC also recommends keeping diabetes supplies accessible and having backup supplies available, particularly when traveling.
1. Small Diabetes Organizer
For everyday activities such as school, visiting friends, or going to an after-school activity, a compact organizer pouch is often the most practical option.
Look for one with:
Several separate compartments
A secure zipper
Easy-to-clean material
Space for a glucose meter
Small pockets for strips and lancets
A separate section for snacks
A comfortable handle or wrist strap
For younger children, a colorful or child-friendly design can make carrying diabetes supplies feel less medical and more like carrying a normal personal accessory.
2. Diabetes Backpack
A small backpack can be a better option when the child needs to carry more equipment.
A good diabetes backpack should have:
Multiple compartments
Padded sections
Adjustable shoulder straps
A lightweight design
Easy access to frequently used supplies
Space for snacks and water
A separate compartment for medications and medical equipment
For children who use an insulin pump or CGM, some specialized diabetes backpacks also provide convenient ways to organize the associated equipment.
3. Insulin Cooling Case
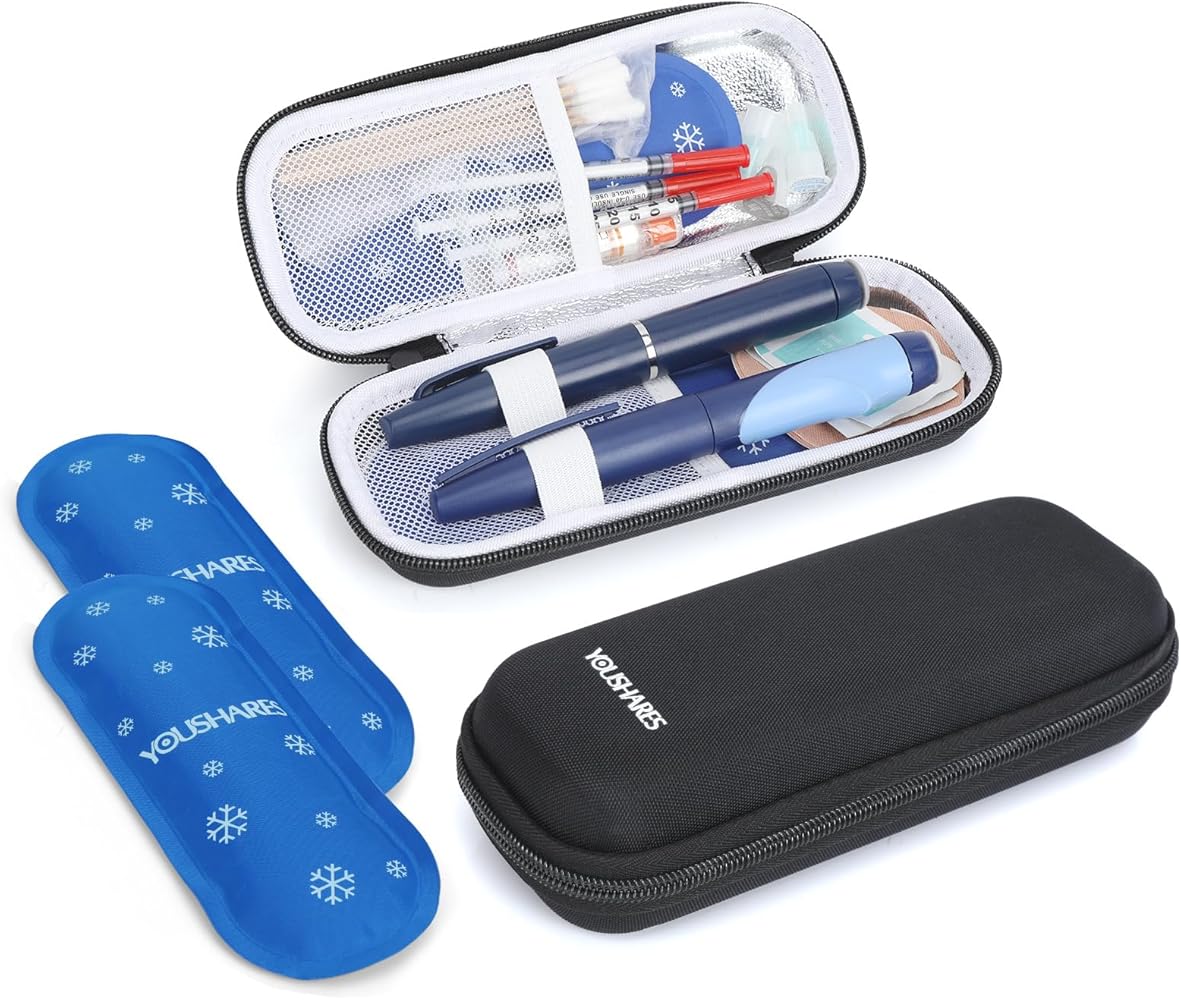
If a child carries insulin that needs temperature protection, an appropriate cooling case can be extremely useful.
Insulin should be protected from excessive heat and cold. The CDC specifically advises against leaving insulin in a hot car, direct sunlight, or directly on ice.
A cooling case can be particularly useful for:
Summer camps
Long car trips
Outdoor activities
Vacations
School field trips
Sports events
Air travel
The American Diabetes Association’s Consumer Guide lists several types of insulin cooling cases, including water-activated and phase-change cooling systems.
4. CGM Adhesive Patches
Children are often more active than adults, so keeping a CGM securely attached can be challenging.
An appropriate CGM overpatch can provide additional protection during:
Running
Sports
Swimming
Playing outside
Hot or humid weather
The CDC notes that additional adhesive patches can help protect CGMs during bathing or swimming and can improve retention in humid conditions or when the device is frequently bumped.
However, the patch should be compatible with the child’s specific CGM and applied according to the manufacturer’s instructions.
5. Small Glucose Meter Case
Even children who primarily use a CGM may benefit from having access to a blood glucose meter as a backup.
A small case can keep:
Meter
Test strips
Lancets
Lancing device
together in one place.
This is especially useful when the CGM isn’t providing a reading or when a glucose value needs to be confirmed with a fingerstick.
6. Fast-Acting Glucose Holder
Children should have an easily accessible source of fast-acting carbohydrate if their diabetes care plan calls for it.
Instead of putting glucose tablets or another treatment at the bottom of a large backpack, consider a small dedicated pocket or pouch.
The goal is simple:
The child—or an adult helping them—should be able to find it immediately.
For younger children, parents and caregivers should make sure responsible adults know where the emergency supplies are stored.
7. Medical ID Bracelet or Necklace
A medical ID can be especially valuable when a child is away from parents.
A bracelet or necklace can indicate that the child has diabetes and provide important information in an emergency.
It doesn’t replace a diabetes care plan, but it provides an additional layer of identification.
8. Waterproof or Water-Resistant Pouch
A waterproof pouch can protect supplies from:
Rain
Pool water
Spilled drinks
Sweat
Accidental leaks
This is particularly useful for children who participate in outdoor activities or sports.
However, waterproofing the bag does not mean every diabetes device inside it is waterproof. Always follow the water-resistance instructions for the specific CGM, pump, meter, and other equipment.
9. Insulated Travel Organizer
For vacations or longer trips, a larger diabetes organizer can keep everything together.
A good travel organizer might have separate areas for:
Glucose monitoring
Meter
Strips
Lancets
Insulin
Pens
Needles
Backup supplies
CGM/pump
Sensors
Adhesive patches
Pump supplies
Emergency supplies
Fast-acting carbohydrate
Glucagon if prescribed
Personal items
Medical ID information
Emergency contact details
Diabetes care instructions
For travel, the CDC recommends keeping diabetes medicines and supplies accessible rather than placing them in checked luggage when flying.
What Makes a Good Diabetes Bag for Kids?
When choosing between different bags, consider these features:
| Feature | Why it matters |
|---|---|
| Lightweight | Easier for children to carry |
| Multiple compartments | Keeps supplies organized |
| Strong zipper | Prevents supplies from falling out |
| Water-resistant material | Protects equipment |
| Easy-to-clean interior | Helpful for everyday use |
| Comfortable straps | Better for school and activities |
| Insulated section | Useful when temperature-sensitive supplies are carried |
| Child-friendly design | Can make diabetes management feel less medical |
| Discreet appearance | Gives older children more privacy |
| Easy access | Important during an emergency |
The Best Setup Depends on the Child’s Age
Young Children
For younger children, prioritize safety and accessibility.
A small backpack or diabetes organizer carried by a parent or responsible adult may be appropriate, with emergency supplies clearly separated and easy to locate.
School-Age Children
A dedicated pouch inside the child’s school backpack can work well.
The child should gradually learn:
Where their supplies are
What each item is for
Who they should ask for help
Where emergency glucose is kept
Teachers and school staff should also know the child’s diabetes care plan and where necessary supplies are located.
Teenagers
Older children often care more about privacy and appearance.
A discreet pouch that looks like a normal cosmetic, technology, or travel organizer may be more appealing than a bag clearly labeled “DIABETES.”
The goal should be to support independence without sacrificing safety.
A Smart “Everyday + Backup” System
One of the easiest approaches is to use two levels of storage.
Everyday Bag
Keep only what the child needs for normal daily activities:
CGM-related essentials
Glucose meter and strips
Fast-acting carbohydrate
Necessary insulin supplies
Medical ID
Backup Supply Bag
Keep additional supplies with a parent, school nurse, caregiver, or in another appropriate location according to the child’s diabetes management plan.
This prevents the child from having to carry an unnecessarily large bag every day while still providing access to backup equipment.
What About Traveling?
Travel requires more preparation than a normal day.
The CDC recommends taking diabetes supplies in an accessible carry-on when flying and bringing additional medication and supplies rather than relying on exactly what is needed for the trip.
For longer trips, consider:
A dedicated diabetes travel bag
Insulin cooling protection when required
Extra CGM sensors
Extra pump supplies
Extra meter supplies
Backup batteries/charging equipment
Fast-acting glucose
Prescribed emergency medication
Copies of prescriptions and important medical information
The CDC also recommends keeping emergency diabetes supplies in a waterproof bag or container and having adequate backup supplies available.
Final Thoughts
The best diabetes bag for a child isn’t necessarily the most expensive one. The right bag is the one that keeps essential supplies organized, protected, accessible, and comfortable to carry.
For everyday use, a small, lightweight organizer or child-sized backpack is usually enough. For insulin users, an appropriate cooling case may be necessary when temperature conditions require it. For active children, CGM overpatches and water-resistant storage can provide additional protection.
Most importantly, make the system simple enough that the child can gradually learn to manage their own supplies as they get older. A well-organized diabetes kit can make daily diabetes management less stressful for both children and their families.
More Tips for Choosing and Organizing a Diabetes Bag for Children
Choosing the right bag is only the first step. How the supplies are organized and where the bag is kept can be just as important. Children may need access to diabetes equipment at school, during sports, on field trips, and while traveling, so the setup should be practical rather than overly complicated.
Keep Frequently Needed Supplies Easy to Reach
The supplies a child may need quickly should never be buried underneath everything else.
A useful organization system is:
Top or front pocket
Glucose tablets or another fast-acting carbohydrate
CGM receiver or other monitoring device, if applicable
Medical ID information
Main compartment
Glucose meter
Test strips
Lancets
Insulin supplies
Pump supplies, if applicable
Separate protected compartment
Extra CGM supplies
Additional medication or equipment
Backup supplies
The exact contents should be based on the child’s individualized diabetes management plan. The CDC recommends developing a Diabetes Medical Management Plan with the child’s healthcare team and making sure relevant school staff understand it.
Create a Dedicated “Low Kit”
One of the most useful accessories for a child with diabetes is a small, clearly identified low-glucose kit.
It can contain supplies needed to treat hypoglycemia according to the child’s care plan, such as:
Glucose tablets
Juice
Other prescribed or recommended fast-acting carbohydrates
Glucagon, when prescribed
A blood glucose meter and supplies, if appropriate
The CDC specifically recommends that schools maintain a “hypo” box containing supplies such as glucagon, glucose tablets, juice, crackers, and glucose-monitoring equipment.
The important point is accessibility. A low kit shouldn’t be stored somewhere that takes several minutes to retrieve.
Consider Having More Than One Diabetes Kit
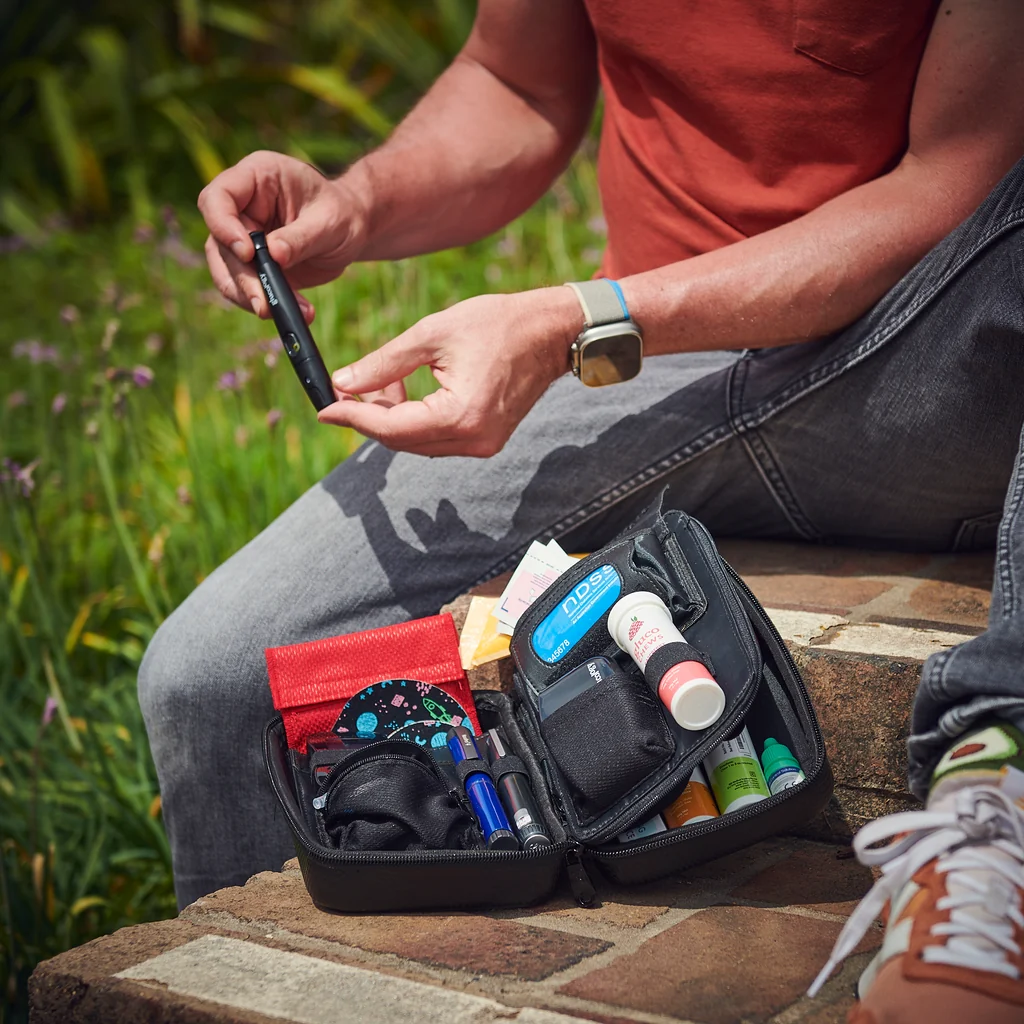
For children, one bag may not be enough.
A practical system can include:
1. Everyday Carry Kit
This travels with the child and contains the supplies they may need during a normal day.
2. School Backup Kit
A second supply kit can remain at school according to the school’s policies and the child’s care plan.
3. Sports Kit
A small separate pouch can be useful for soccer, swimming, gymnastics, running, or other activities.
4. Emergency Kit
A larger backup kit can contain additional supplies for unexpected situations.
This approach reduces the risk of discovering that an important supply was accidentally left at home.
For school, the CDC recommends having an organized supply checklist, while ADA guidance emphasizes that children need access to diabetes care equipment during field trips and extracurricular activities as well.
Best Accessories for Active Children
Children who play sports need a slightly different setup.
Sports Waist Pack
A lightweight waist pack can allow an older child to carry essential supplies without wearing a full backpack.
Small Crossbody Bag
This can be convenient for children who don’t want to carry a backpack during activities.
Waterproof Pouch
Useful for protecting supplies from rain, splashes, or accidental spills.
CGM Overpatch
An appropriate overpatch can help keep a CGM secure during physical activity. It should be compatible with the specific CGM and used according to its instructions.
Insulated Medication Case
If temperature-sensitive medication needs to be carried, use an appropriate storage solution based on the medication’s storage requirements.
Don’t Make the Bag Too Big
A common mistake is creating a huge “medical suitcase” that the child doesn’t want to carry.
Instead, think in terms of essential + backup.
The child should have immediate access to what they may actually need during the day, while additional supplies can be stored appropriately elsewhere.
This is particularly helpful for older children and teenagers, who may be more comfortable carrying a discreet pouch rather than a large medical-looking backpack.
Make the Bag Child-Friendly
A diabetes bag doesn’t have to look like medical equipment.
Children may prefer:
Their favorite color
Cartoon characters
Sports-themed designs
Simple black or neutral designs
A backpack that looks like those used by their classmates
For younger children, fun designs can make the bag feel like a normal personal item rather than a reminder that they have diabetes.
For teenagers, a discreet technology or travel organizer may provide more privacy.
Label Important Supplies
Labels can be extremely helpful when other people may need to help the child.
Consider labeling:
The child’s name
“Diabetes supplies”
Emergency contact information
Where fast-acting glucose is stored
Where glucagon is located
However, avoid placing unnecessary personal information on the outside of the bag.
School Staff Should Know Where the Supplies Are
A diabetes bag is only useful if the adults responsible for the child know how to access it.
The child’s school should have an individualized diabetes management plan that explains their care needs, including blood glucose monitoring, hypoglycemia treatment, medications, meals/snacks, and physical activity.
Staff responsible for the child should also know where emergency supplies are kept and how to respond during a diabetes emergency.
For field trips and extracurricular activities, diabetes supplies should remain safely accessible rather than being left behind at school.
Check the Bag Regularly
Even the best-organized diabetes bag becomes useless if supplies are expired or missing.
A simple weekly or monthly checklist can include:
☐ Glucose meter works
☐ Test strips haven’t expired
☐ Lancets available
☐ Fast-acting glucose available
☐ Insulin supplies available, if applicable
☐ Pump supplies available, if applicable
☐ CGM supplies available
☐ Glucagon is present and not expired, if prescribed
☐ Batteries/charging equipment available
☐ Emergency contacts are current
☐ Snacks are replaced when needed
The CDC recommends checking expiration dates and replacing supplies that are close to expiring as part of emergency preparedness.
A 3-Level Organization System Works Well
For many families, the easiest system is:
LEVEL 1 — CHILD’S BAG
Essential supplies that need to be immediately accessible.
LEVEL 2 — SCHOOL/CAREGIVER KIT
Backup supplies kept in an appropriate, accessible location.
LEVEL 3 — HOME EMERGENCY KIT
A larger reserve of diabetes supplies for unexpected situations.
For extended school emergencies, ADA school guidance recommends having an emergency supply kit capable of supporting the child’s diabetes care for at least 72 hours.
The Goal: Independence Without Leaving the Child Alone
As children grow, they can gradually take more responsibility for their diabetes supplies.
A younger child may simply learn:
“This is my diabetes bag, and this is where my glucose treatment is.”
An older child may learn to:
Check their supplies
Carry their own meter
Recognize when they need help
Keep track of CGM supplies
Prepare their bag for school or sports
Tell a trusted adult where their emergency supplies are
Independence should develop gradually and according to the child’s age, maturity, abilities, and diabetes management plan. ADA guidance specifically recognizes that self-management is a gradual process and that even children who normally manage their own diabetes may need trained adult support during emergencies.
Final Checklist for the Ideal Children’s Diabetes Bag
A well-designed setup should be:
Lightweight — so the child will actually carry it
Organized — supplies are easy to find
Accessible — emergency items aren’t buried
Durable — able to withstand school and play
Easy to clean — useful for everyday use
Weather-resistant — protects supplies from the environment
Age-appropriate — suitable for the child’s level of independence
Discreet or fun — depending on the child’s preference
Well-stocked — with regular expiration-date checks
Backed up — additional supplies available at school/home when appropriate
Ultimately, the best diabetes bag is the one that allows the child and the adults around them to respond quickly without making diabetes management more complicated than it needs to be.